Saturday, 20 August 2011

Research & Self Critique


Research

For this assignment, I did some research on doing my 3D box animation. Firstly, I researched using the links to the Autodesk website provided in the lab notes where I found great helping tips and tools to aid in my progression of the assignment. Also, the previous lab exercises, especially week 13’s tutorial (which is the crane arm), were useful when I went back to read and do them again. It refreshed my memory of doing animations and made doing the assignment easier for me.

At first, I had thought that using parenting in the assignment would be enough to do the assignment. However, it wasn’t the case as there were 4 boxes in my assignment, unlike the lab practice in week 13. As a result, I was forced to change my animation style into using parent constraint and setting rest positions in the assignment. I learnt all these through my classmates and Maya videos found online.

Secondly, I tried to make the entire animation as realistic as possible. For example, when the arm is lifting the box upwards, it will move slower due to the act of gravity. However, there were some parts that I thought were not as realistic as I had imagined it should look like. I went online to find animations that looked realistic and also tried to imitate the crane arm actions in reality in order to aid my assignment in looking better.

Self Critique

The final output of my assignments did not turn out as nicely as I had expected even though I did my assignment in three different versions, with every latest version looking as realistic as possible I could make with my skills. However, I think that it is not a bad effort for me as given just a few weeks of playing around of the animations in Maya, it is a good piece of work as I placed lots of concentration and effort into the assignment.

However, there are definitely a few flaws in my assignment. Firstly, my assignment does not look realistic enough at some parts of the animation, especially during the pick-up and drop down of the second box. Other than that, I think the rest of the boxes are quite okay.

Also, the part of the animation when the crane arm finds out that there is a red box instead of the green boxes. I tried to express the feelings of the crane arm itself but it did not come out as clearly and I think this is probably because of I did not pay much attention to the detailed movements of the arm and instead I paid attention to the general movement.

Another flaw is the picking up of the boxes. Because I set had set a limit to the movement of the arm before, the arm couldn’t stretch as far to reach one of the boxes and pick it up properly. Hence, the arm didn’t pick up the box right on the middle top of the box. When the green boxes are stack on each other, the boxes’ position do not really compliment with each other, but they are stacked up on each other nonetheless.

Other than that, I think that my assignment is done quite nicely.

Assignment 2 Animation

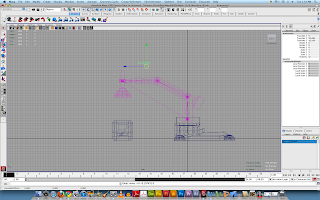
Firstly, like in the previous exercise, I linked the joints of the crane arm together so that everything will move together when moved/ rotated (of course, the parent constraints also play a part in setting everything in position when the animation is made).


In this screenshot, the crane arm is supposed to pick up the first green box and then move it to the rectangle platform on the left. To be able to accomplish this animation, I first parented the box and the platform to fix the initial position of the box so that the box would not be appearing at any part of the maya 'world' instead 


Here, the arm is picking up the second green box. Before the arm picks up the second box, I parent constrainted the platform with the box and the arm with the box so it will be easy for me to set the pick up and release of the box. At the frame when the box is stacked on the first one, I set the rest position of the box so it will not appear anywhere in the maya world and will stay at its final position.


For this part of the animation, the box sees the red box. I wanted to make the initial reaction of the crane arm to be shock, as there is a red box among the green boxes. Then the arm will go to the other remaining green box and the first two green boxes to check the colour of them. After checking the stack, the arm will give a sigh and look back at the red box and to the stack, thinking what to do about the red box. This part of the animation is done purely by setting keyframes on the arm control and the base. No parenting or sort was needed here.


At this point, a sudden idea will pop into the crane arm and it will move the red box onto the other platform, separating from the other green boxes. Parenting(constraint) of the platform and box, crane arm and box was needed to complete this part. And the constraints were all done at the frame where the crane arm comes in contact to pick up the red box.


The only remaining thing for the crane arm to do here would be to stack the remaining green box on the stack of green boxes. After stacking the final box, the arm will return to a 'hibernation' mode. Like the other parts of the animation. I only used parent constraining(where armcontrol constrain was 1 and platform constrain was at 0) at the frame where the box was picked up. After stacking the box, I set the rest position of the box so that it will not move elsewhere after all the animation has been done. After that, the remaining part of the animation left was to make the crane arm go back to its original position. And so I set the keyframes of the arm control and base again in order to complete this animation.


Final animation output

Tuesday, 2 August 2011

Assignment 2 StoryBoarding


Storyboarding details

1st picture: Crane arm is stacking green boxes.

2nd picture: Crane picks the first and second green boxes up normally and set them down at designated place.

3rd picture: Crane arm sets down second green box, turns around and finds itself looking at a red box.

4th picture: Puzzled, the arm turns to look at the green boxes before turning back to the red box.

5th picture: Arm decides to pick up the red box to separate it from the stack of green boxes.

6th picture: Arm goes ahead to pick up the last green box and put it together with the other green boxes.

Tuesday, 19 July 2011

Week 12 Lab(3 bouncing balls exercise)


This aim of this exercise is to allow us to learn how to control the speed of three different balls falling, each of different 'weight', as assumed. The heaviest ball is on the left, followed by the middle ball and finally the one on the right. We had to set the extreme key frames of each ball and starting from there, slowly tune the speed of the ball to suit its 'weight'. The heavier ball will land first and followed by the lighter ones. Using the graph editor, I was able to control the falling and rising speed of the ball but seems to be some minor mistakes that I spotted but found it difficult to solve as the correction made to the speed is too insignificant.

This is the video of the final output of the lab exercise.

Monday, 18 July 2011

Week 13 Lab 1


Learning about inverse kinematics. We were learning about some skeleton/joint tool. Also, the IK Handle tool.  The IK handle tool is to connect a 'line' from the first to the last or designated joint so the there will be like a 'movement'. For my case, it is like an arm bending movement. I felt that this part was quite easy for me to do.


Learning about IK handle and turning on and off the layer 'mesh'. This method is to allow easier view of the skeleton and joint instead of viewing the model and the joints/skeleton altogether.


 Adding in a locator and annotation so that it is easier for us to rotate the entire crane. We learnt to use the locator and annotator tool. The locator tool is to allow easier control of selected parts of the model/ skeleton/joints. As a result, when the locator is selected, the entire arm (colored pink in the picture) will move together. The locator increases convenience during the animation process and makes it easier for me to set the key frames when everything is coordinated with each other. On the other hand, the annotator allows the user, me, to see where the locator is as the locator is marked with only a 'X' or '+' shape, which might make the locator hard to find if the grid is switched on.


Ending product. However, I am not really satisfied with the first two seconds when the box canbe seen moving up and down on its own, maybe due to the parenting/ constraints. I will try to rectify this problem and repost and new video if the problem is fixed.

Saturday, 9 July 2011

Week 11 Part 2 (E-learning)


For this e-learning, the objective was to make the ball bounce as realistically as possible. There was much usage of the graph editor for this lab exercise. The ball had to bounce as if there was 'gravity' acting on the ball. The bounce rhythm had to be faster and faster because of the reality of the situation. I had to adjust the Translate Y gradient as it was the key point that controlled the falling and rising speed of the ball. The accuracy of the lab exercise had to be precise as possible so that I can gain as much experience.

Thursday, 7 July 2011

Week 11 Part 1 (E-learning)


Through this e-learning part 1 lab exercise, I learnt more on how to do animations on Maya. The animation of this bouncing ball became smoother than my previous exercise with the help of the graph editor and tutorial provided. Through controlling the tangents of the key points, I was able to make my ball bounce more realistically in terms of elasticity and the 'gravity' acting on the ball.


At this part, the graph editor and smoothness of the bouncing ball is almost done except for some part where the gradients of the Translate X and Y have to be edited before running the animation. The static channel and others have yet to be deleted to make Maya run the animation run more smoothly.


The final 3 second animation of the lab exercise

Monday, 4 July 2011

Week 10 Lab (Basic Animation)


For this lab, I learnt how to do basic animation, frame by frame. I made a bouncing ball for both lab sessions. However, I encountered some problems while making the animations. Firstly, the physics of a bouncing ball. It was a little tough at first to make the ball drop faster when it is falling onto the 'ground' but after re-doing the frames for a few times, I was able to make a better gravitational effect compared to my first attempt.

Thursday, 9 June 2011

Assignment Research and Self-Critique

Research


Initially, my only resources to make my model were the tutorial PDF files and videos provided in OLIVE, and also, my gun. However, I felt that the limited resources were not enough for me and hence I went online to a Maya FAMAS tutorial to reference on modelling a gun (although the tutorial showed how to model a rifle, I thought  that I still learnt something from it that can be implemented in my pistol modelling). The tutorial was especially helpful when it mentioned that vertexes are especially helpful in shaping a gun model. However, there were some parts that did not work well when I used vertexes. As a result, I had to use the face mode to do the shaping of the gun, although the results did not turn out as nicely compared to the usage of vertexes.

Model of a chain gun

This is a model of a chain gun. The tutorial of making this chain gun is somehow similar to the bucket exercise I did previously. Although I didn't learn much from this tutorial, I got some minor tips like being careful while modelling anything. Anything can seem easy but when it comes to modelling, it is really tough and requires intense, undivided attention.

Self-Critique
VS
                      Model                                                    Original


I think the final model of the gun is quite successful, except the fact that there were some details missing if compared between the original object and the final model. The left-out details proved to be too challenging for me and hence I left them out and concentrated on the easier details so that the gun model will not look so empty.

Secondly, another problem with my model will be that the scale did not turn out as I wanted it to be. This was because the reference image in my Maya turned out to be compressed at the length. Hence, the body of the gun turned out shorter and thicker compared to the original object.

I also could not find an appropriate rusty, bronze texture which I needed for my gun model. I ended up applying a normal bronze texture colour as a replacement.

However, there are also positive thoughts about my own model. Firstly, I think that I adapt quite fast when facing problems like the lack of details. I would concentrate more on the details that I added on so that the details will still look quite similar to the one on the original object as I am more concerned of the quality than the quantity of the details in the final model. I also think very positively of my final model because it looks much newer compared to the original which has rusted.

Wednesday, 1 June 2011

Assignment 1 Modelling and Texturing (Gun)

 Original object for the assignment.


Done with the basic shape of the gun, I'm planning to put in the minor details of the gun soon. I think the details of the gun will take me more time compared to shaping the model as I have the image reference here in this stage. Shaping the gun took me a few hours even though it looked easy at first. Much extruding and moving of the faces was needed in the process. The shape of the body had to be as accurate as possible and I had the scale and move the faces and vertex of the polygonal cube around to get the satisfactory shape. The trigger and the handle was completed with the Create Polygon Tool which made it quite easy for me to make them. The only hard part was that if I made a mistake in tracing the handle or trigger, I had to restart tracing these parts from square one.


Made some progress with the minor details that I needed to add in. The minor details  which looked easy to do were in fact difficult without reference and I had to estimate the positions of these details by looking at the real object. The two details added in took me two whole hours to complete because if it looked unsatisfactory, I would re-do the details all over again. The hole behind is basically made by creating a polygonal cube and putting it where I wanted the hole to be, then using the Boolean -> Difference tool to create the hole. The detail near the gun barrel is made by scaling, moving and extruding the faces involved. I had a small problem before which was that the Split Polygon tool didn't work for me. Hence I had to use the Edge Ring tool to aid in making the part which I wanted to extrude. It took me a longer time compared to if I was to use the Split Polygon tool.


Up to this part, the details are more or less done, apart for some details that are really hard for me to make. I had to make these details as accurate as possible so that it will look like the original object. This part of the detail only requires me to split the polygon and extrude the targeted faces. However, scaling was the hardest as I only have the real object as my reference at this point of time.

Perspective view of final model

Side view of final model

Texturing is done at this point. Using bronze for almost the entire model with exception of the handle which should be orange. I also used the blinn material as the gun is initially shiny. Using the lambert material will cause the gun to actually look as if it is made out of wood and this will not be a closer replica compared to using blinn. The orange handle is made of lambert material as it has a non-reflective surface compared to the body and barrel of the gun. I referred to the tutorial video provided for us but it turned out a little difficult for me to follow up with my gun model and hence I just inserted the bronze texture face by face.

Wednesday, 25 May 2011

Week 5 Lighting Exercise


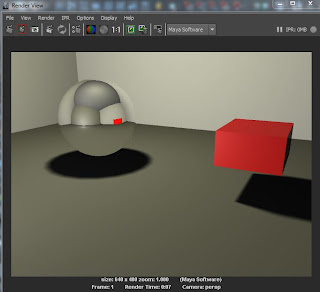
Today's exercise is about shading. I had to learn the process of making an object made of blinn and setting the reflective settings of the object. Through this exercise, I can learn the different lighting modes and the reflective setting (how reflective are they when light shines on it) while playing around with the program.

Tuesday, 24 May 2011

Week 5 Dice exercise


The dice exercise we learnt today was a brand new thing that I had never tried before. Putting texture into a dull polygon object was new to me and I had doubts of actually trying to complete the exercise at first. The tutorial videos given to us were so boring as the narrator had a monotone voice and I almost fell asleep twice going through the video. However, when doing the dice, I found out that it was quite interesting and realised a few factors that needed to be taken care of in the process of applying texture to my dice. One of them was to remove the history after completing the process as failure to do so will result in the texture being inconsistent and the dice will not get its definite pattern.

Wednesday, 18 May 2011

Assignment 1 Sketches and Storyline


Sketch of gun object for Assignment 1


Descriptions of making the gun object are stated in the sketch book.

Storyline

The engines of both cars burst into life. Rat ignited the first gear and maneuvered his mousetrap car towards the starting point, together with his opponent. Soon after, the blast from the air gun signified the start of the race. Both cars surged forward at lightning speed. The two drivers drove through loops and dangerous curves skillfully. Out of a sudden, Rat heard one of his tyres pop and realised that something had actually punctured one of his tyres. He turned just in time to see that someone had actually taken a shot at his tyre with a pistol. As a result, the opponent was able to outrun him and not surprisingly, won the race. Rat was devastated. He had never lost a race before, and now he had lost one because unethical methods were used by the opponent.

Week 4 E-learning reflections

Does multi-tasking give you a real or false sense of having accomplished something?

Ans: No. Personally, I will try to avoid multi-tasking as my brain 'Random Access Memory' (RAM) isn't very high. I cannot do multi-tasking very well or else the efficiency and effectiveness of my work will drop. Hence, as a result, I think that multi-tasking doesn't give me a sense of having accomplished something. It will in fact backfire, as the quality of my work will drop and I will have to re-do it again.

Is learning 3D and design different from learning programming? Or is it all learning the same? Why?

Ans: To me, learning 3D and design is different from learning programming, but at the same time they are the same. 

Firstly, 3D and design is actually quite flexible. If there is any obstacles in making a model, there can be other ways to make the same product by using other tools in the design program. However, in programming, once we are stuck facing an obstacle, the programming error can only be solved only be altering some parts of the code using the programming language. To sum up, programming can only be solved using one or two (rarely) methods while in designing, the same product can be made using different tools. 

The next point is that both 3D and design and programming needs to be practiced in order to prevent the knowledge from rusting. Programming and Design sometimes need to be taught by theory but it is the practical (hands-on) part which actually facilitates the learning process. Hence both learning methods are the same.

The articles states that "Learning is actually a very complex operation for an individual". Do you agree with this? Do you feel that your approach to learning is the best way? If yes, how? If no, how can you change your work style?

Ans: I agree to a small extent. For me, I will prefer self-learning compared to a lecture session. I will tend to be distracted during lectures as my friends will be talking to me at the same time. When we hit an interesting topic, I will end up not listening to the lecture. Hence I will prefer self- learning as my learning method. However, I will also not say it is the best method of learning because when I hit an obstacle while learning, I will have no teachers or lecturers to turn to for advice. I will try to change my learning style so that it will become a win-win situation during lectures and when I'm doing self-learning.

What are your thoughts about the last paragraph in the extract?

Ans: I think that the importance of communication is really important. Without communication, many things cannot be solved easily as people might have a hard time trying to understand one another. I also agree that students for the current industry have talent and the personality to fit in with the team. However, it is up to the student if he/she wants to make use of his full potential.

Should your lecturers also focus on your work attitude, or just leave you to sink or swim on your own? Why?

Ans: It depends on the situation. If there is something important, the teacher should provide at least a little help rather than to leave us to sink or swim on our own. However, if the matter is quite manageable, the teacher should give us an opportunity to swim on our own so that we can learn to be more independent.

Monday, 16 May 2011

Bucket exercise

Bucket side view

Bucket perspective view

Bucket top view

For this exercise, I learnt how to revolve a 2D polygon plane to a 2D images and transform it into a 3D bucket by using the revolve tool. It is quite awesome to find out how much this program can do. Using the CV Curve tool, I was able to crave out the shape of a 2D portion of the bucket image. It was a little tough to always keep the curve tool outside the lines of the 2D image as it need accuracy. If not, the bucket would look very weird. 
Throughout the entire exercise, the toughest part for me will be the handle of the bucket. I had to redo the handle 3 times because either my Curve tool wasn't accurate enough or the handles were done wrongly.
Overall, I will say that the bucket exercise is one of the toughest exercise so far among all the other exercises.

Saturday, 14 May 2011

Week 3 Lab 2 Washboard exercise

Washboard perspective view

Washboard top view

For this exercise, making the washboard is fairly simple for me as it teaches me how to align the objects properly. Compared to the bucket exercise, this exercise is much easier as it does not have many complicated steps in the pdf file to adhere to. There are also many beveling and extrusions needed to make the glass part of the washboard. Hence, it needed much concentration to avoid clicking on the wrong edges and resulting to mistakes appearing all over the washboard.  

Wednesday, 11 May 2011

Box exercise


Box exercise in Week 2's exercise. There are some extra lines on the box and I didn't know how I got them. I have done up till the rotated flaps currently. Will update the final product as soon as possible once I have completed it.


The final product is finally done. I had to re-do my box as I had problems scaling the vertexes at the earlier stage. This part was really challenging as I had to select all the correct vertices, else my box will turn out weird like the one before. The rotating of the side flaps are also quite hard due to the vague instructions in the pdf guide. I had to think of other methods to rotate the flaps. 

Week 3 Lab 2 Track exercise


This are the 2 different tracks done during the Week 3 2nd lab session. Through this lab session, I have learnt how to make a straight track. I also learnt how to make a curved track by setting the Status line to Animation: Create deformer, then selecting the nonlinear, bend function. I also used the Edit UVs (normalize) method to produce the initial shape of the track in a polygon shape before extruding it out to make it longer.

Tuesday, 10 May 2011

Week 2 Lab 2 Train Exercise 2 (Part 2)

Train perspective view

Train top view

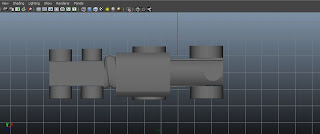
Train side view

Through this exercise, I am able to refresh on what I did during my first lab session on week 2. Although I am quite used to the Maya program now, I still think there are improvements to be made in my future models.

Friday, 6 May 2011

Lab 2 part 2 (Gear exercise)

The gear done in lab 2 part 2. Perspective view.

The gear done in lab 2 part 2. Top view.

Robot done in week 1 lab

Original robot front view

Original robot perspective view

Wednesday, 4 May 2011

Week 2 Lab(Wed)


Done during lab lesson on Wednesday. Complicated, but awesome (especially the gable with the semi- cylinder hole).

Wednesday, 27 April 2011

IN3D Exercise 1

Briefcase


Robot


M1A1 Tank


The 3 different images drawn by me for week 1. The first picture that I have drawn, the M1A1 tank, was relatively hard to draw due to the complexity of it. During the drawing process, I had some help from the ruler as my free-hand drawing is quite weak. Tried to avoid drawing in much detail, especially for the tank. I learnt that drawing an image out of primitive shapes isn't that easy after all. Other than that, the assignment given was quite easy.